

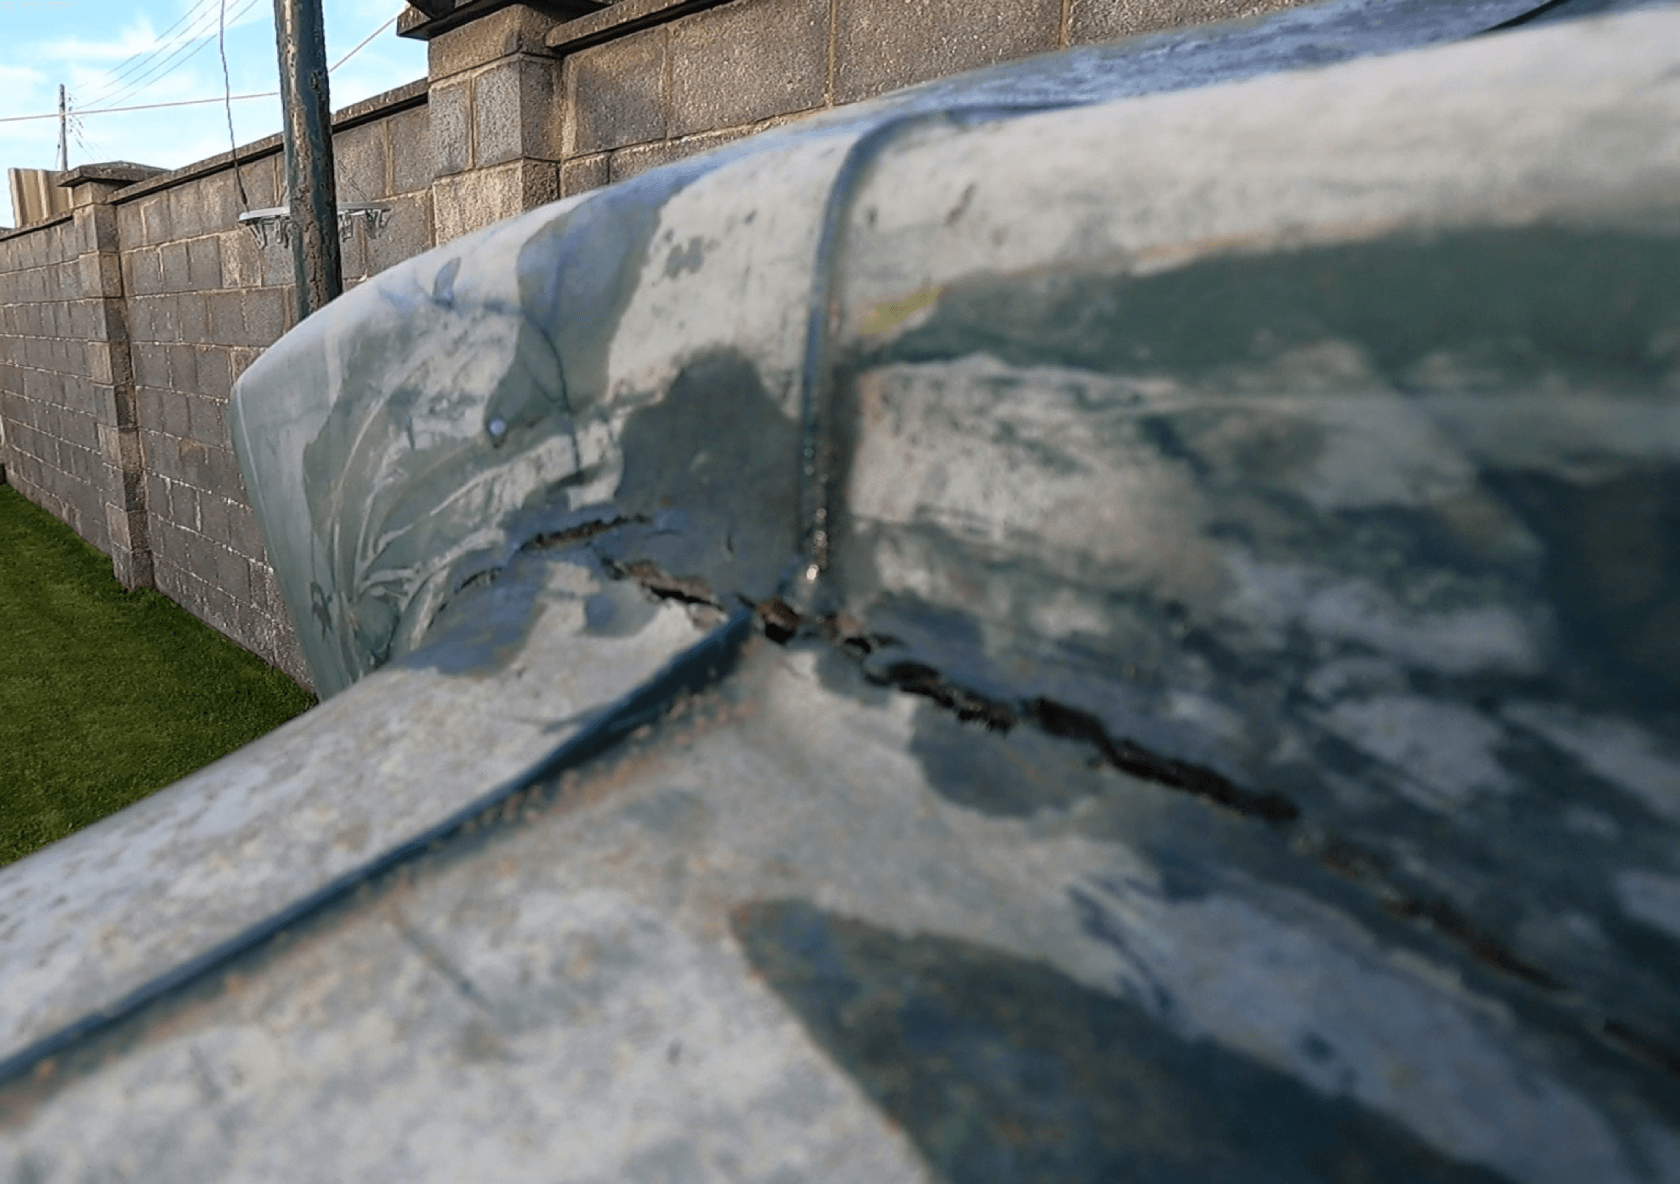
A crack at the top of an oil tank is not a small cosmetic issue. It is usually a sign the tank structure has started to fail, and it can let rainwater into the tank. That water then ends up in the line and can cause boiler faults or even a breakdown.
1) Do a quick, safe check
Have a careful look around the tank (no smoking, no open flames):
If oil is actively leaking, try to keep people and pets away from the area and don’t disturb the tank more than necessary.
- Visible hairline cracks or splits along the top edge
- Damp patches, staining, or an oily sheen
- An unusual smell of oil or dampness around the tank area
If oil is actively leaking, try to keep people and pets away from the area and don’t disturb the tank more than necessary.
2) Avoid quick patches as a solution
It’s very tempting to tape it or seal it, but that usually only masks the problem. The tank can keep weakening, and you may still get water contamination inside.
3) Understand the real risk
A crack at the top is often the start of a more rapid failure phase. Once water gets in, it can create sludge and contamination that causes repeated burner problems. Leaving it can lead to a bigger leak and a much more expensive clean-up.
4) Get a specialist to assess it and plan the next step
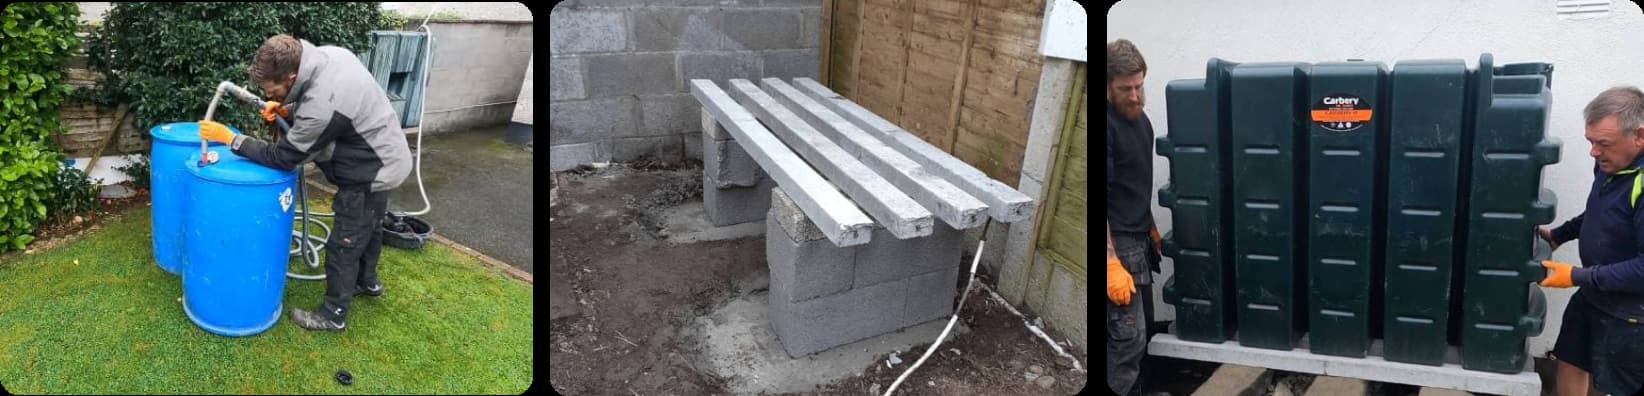
In many cases, the right fix is replacement rather than repair. The usual replacement job takes around two hours and typically involves:
- Draining any usable oil into suitable temporary containers
- Sorting the base if needed and installing the new tank
- Removing the old tank and disposing of dirty residues properly
5) Check the base, not just the tank
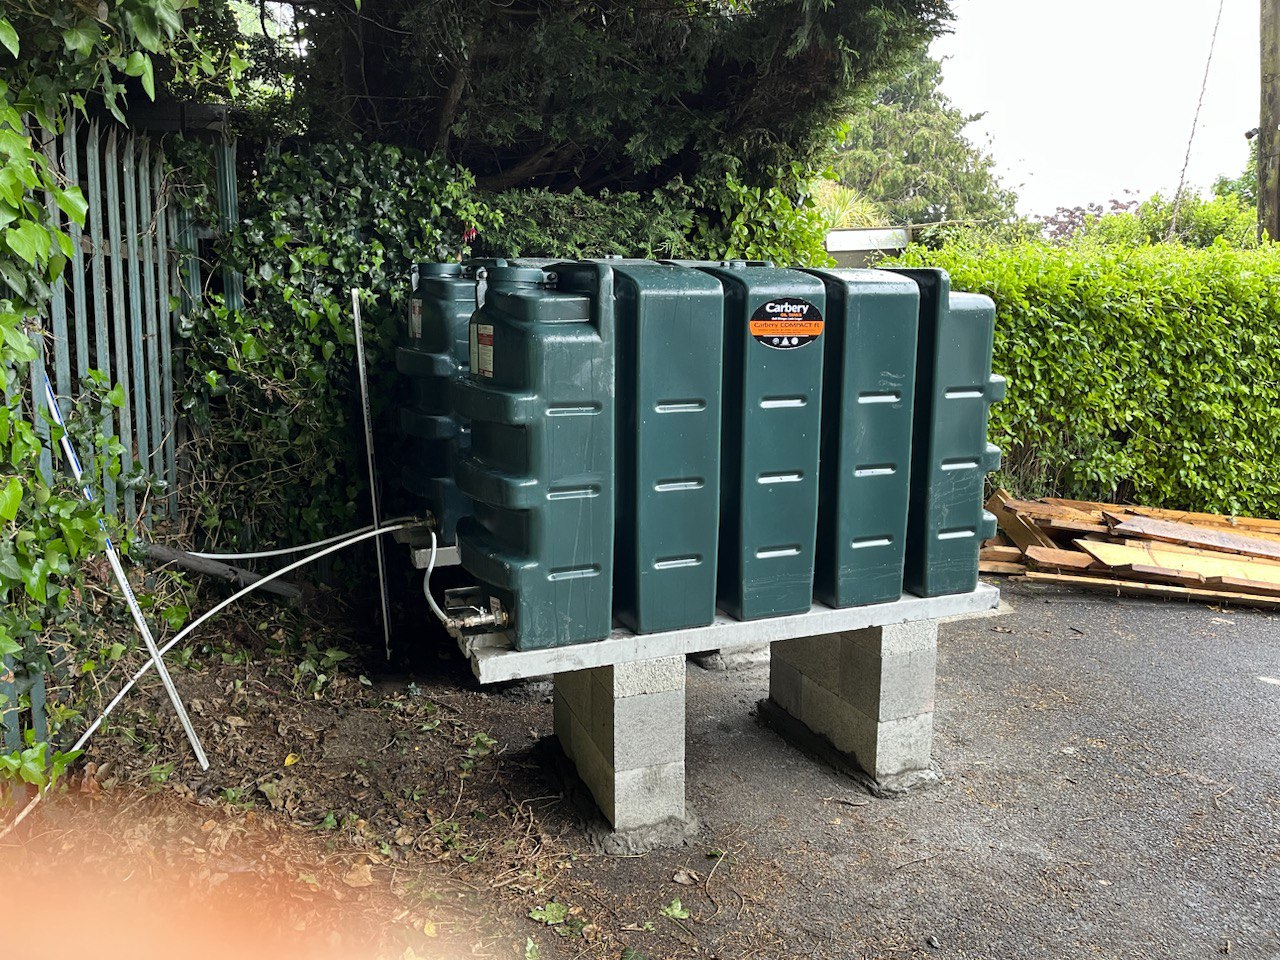
One of the most common reasons tanks crack is a base that is not solid or level. Over time, an uneven base puts stress on the tank walls and top edges until cracks appear. Any proper replacement should include a base check and, where needed, a repair or upgrade. Importance of proper tank base
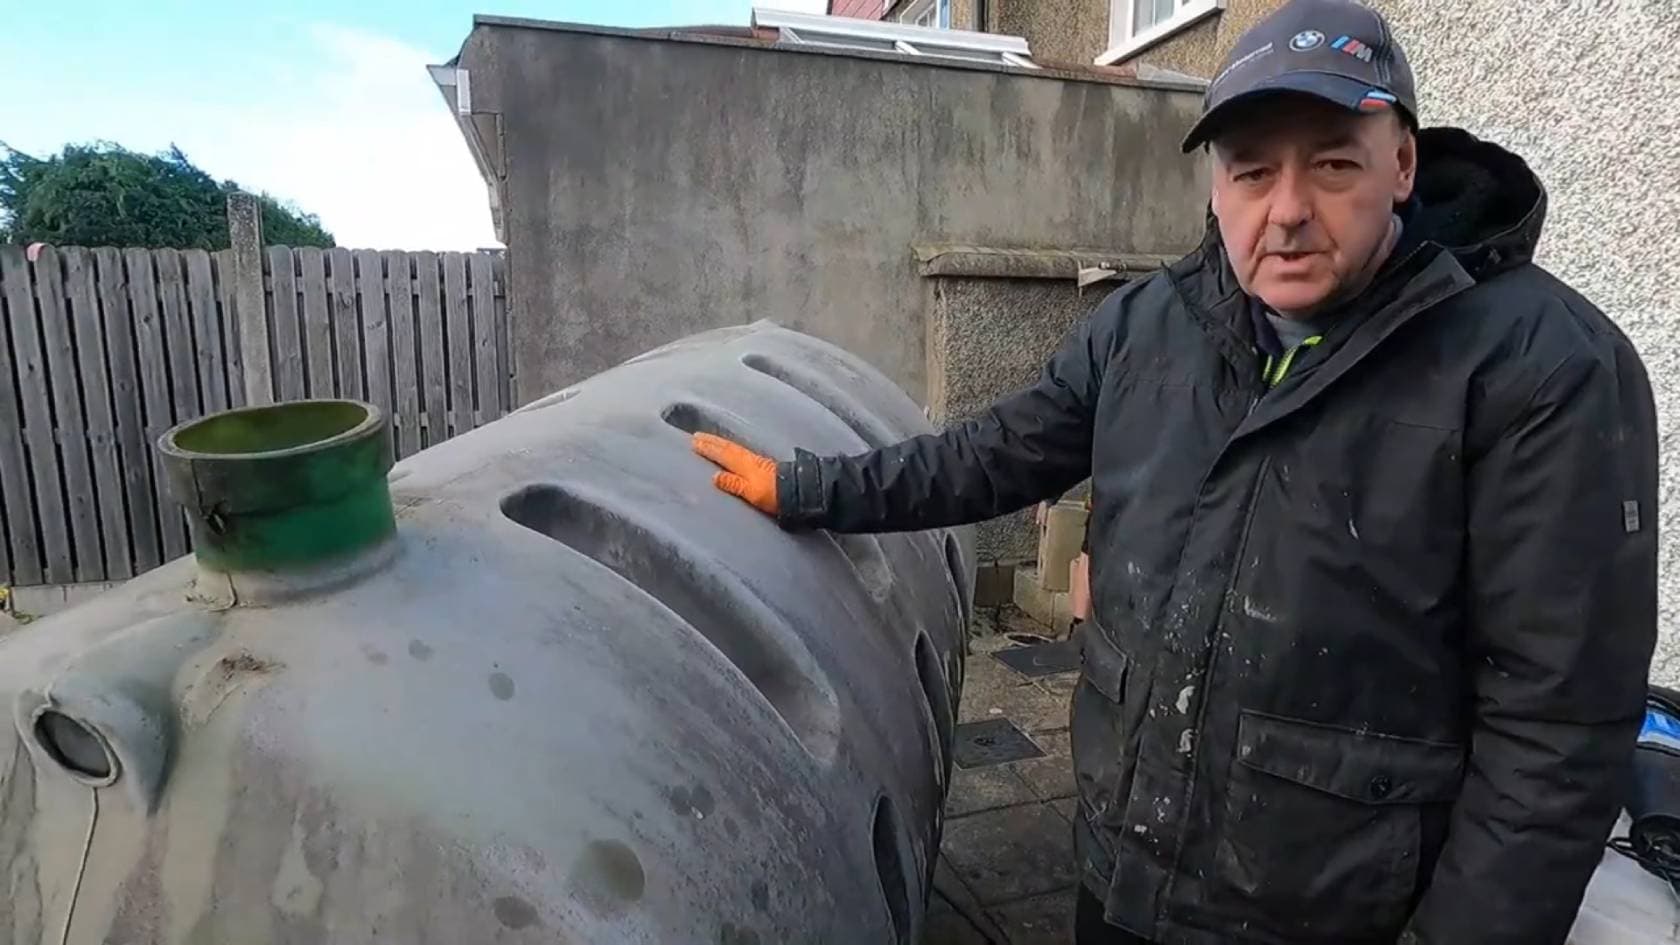
A real example from South Dublin
A homeowner noticed cracks at the top and tried sealing them with heavy-duty tape. The boiler then started acting up more and more, with frequent call-outs. When the tank was inspected properly, there was still about 400 litres in it, and during filtration they found roughly 40 litres of condensate and deposits, which explained the boiler trouble. In that case a major oil spill was avoided, but it does not always work out so neatly.
Choosing the right replacement tank
When you are replacing a failing tank, it makes sense to fit a quality unit. We supply and fit Carbery tanks made in Ireland, with single skin or bunded options, and we’ll guide you on what suits your setup.
How to reduce the chance of it happening again
Annual check in the early years: For the first five years, it’s worth inspecting the tank and base once a year. It helps catch small issues early and can extend service life (modern tanks can last 10 years or more when installed correctly).
Think about Irish weather: UV and temperature swings do take their toll. If possible, place the tank on the shadier side of the house, or in a ventilated enclosed area (not sealed in).
Think about Irish weather: UV and temperature swings do take their toll. If possible, place the tank on the shadier side of the house, or in a ventilated enclosed area (not sealed in).
Where we cover
We provide oil tank replacement, relocation, removal and disposal, base repair/rebuild, and oil transfer/filtration across Leinster, and we work alongside local trades and heating engineers for smooth reconnection.
Full coverage details are here: https://oiltankreplacement.ie/service-areas
Full coverage details are here: https://oiltankreplacement.ie/service-areas
Need help quickly?
If you can, send a few clear photos of the tank and the base and we can advise the best next step. The sooner it’s dealt with, the easier it is to prevent water contamination, boiler issues, and a bigger leak.
Send photos via WhatsApp
Send photos via WhatsApp


